You will need…


Enter the search term and press "ENTER" .
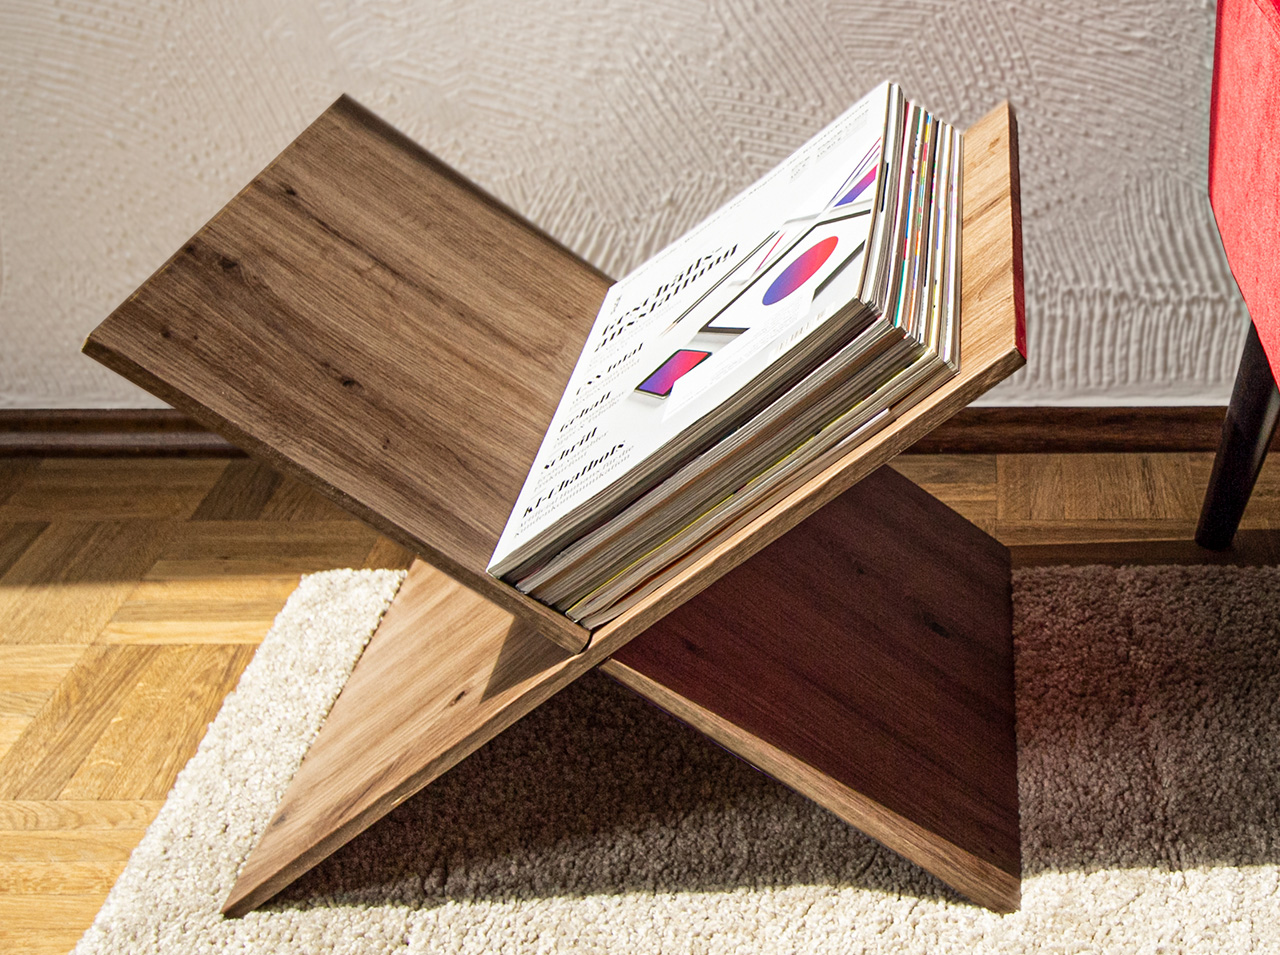
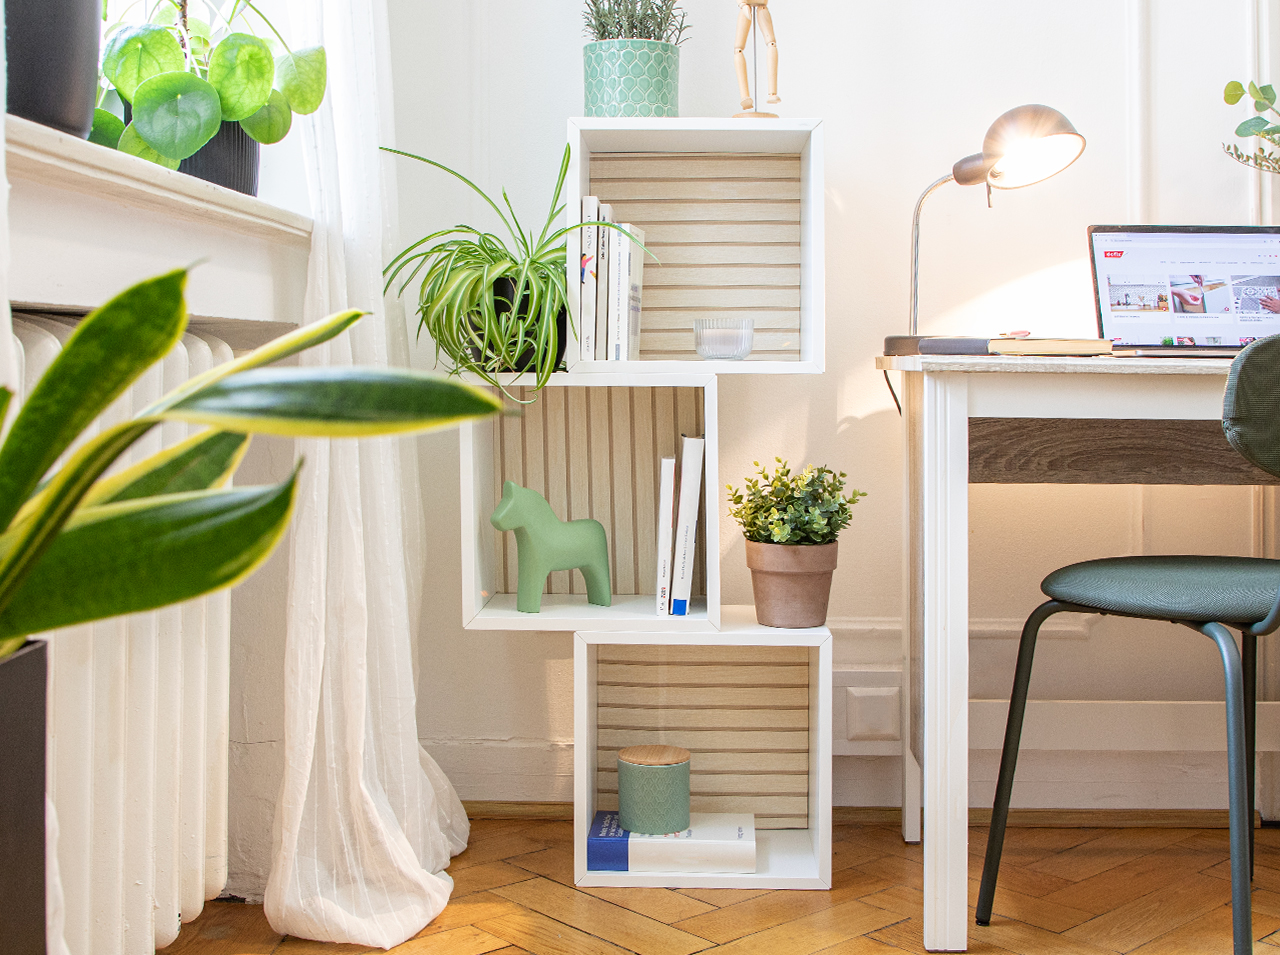
Home DIY: Now you can create some stylish order for all your newspapers and magazines!
Project from Chris - 2 CommentsAs a DIY fan and someone who is interested in beautiful living, you most probably have these too: stacks of magazines, brochures, design catalogs and newspapers. Inspiration – for you to pick up again and again, and you are not likely to dispose of them after just one reading. Introducing the solution that organizes magazines in a beautiful way: The modern, cleverly minimalist storage for newspapers can be created with the new d-c-fix® adhesive foil in Artisan Oak or Ribbeck Oak with its modern wood effect to harmonize perfectly with your interior design style.
Now you can say “Goodbye chaos!” and look forward to your DIY newspaper stand!
The question is: Which great wood effect would you prefer?
- One roll of d-c-fix® in Artisan Oak
- or
- One roll of d-c-fix® in Ribbeck Oak
- d-c-fix® Application kit with doctor blade and cutter
- 2 rectangular wooden boards of the same size
- Jigsaw
- Ruler
- Pencil
- Scissors
Let’s go
 Step 1
Draw the areas to be cut out on both wooden boards with a pencil. They must be exactly centered and of equal length – and their width must correspond to the board thickness.
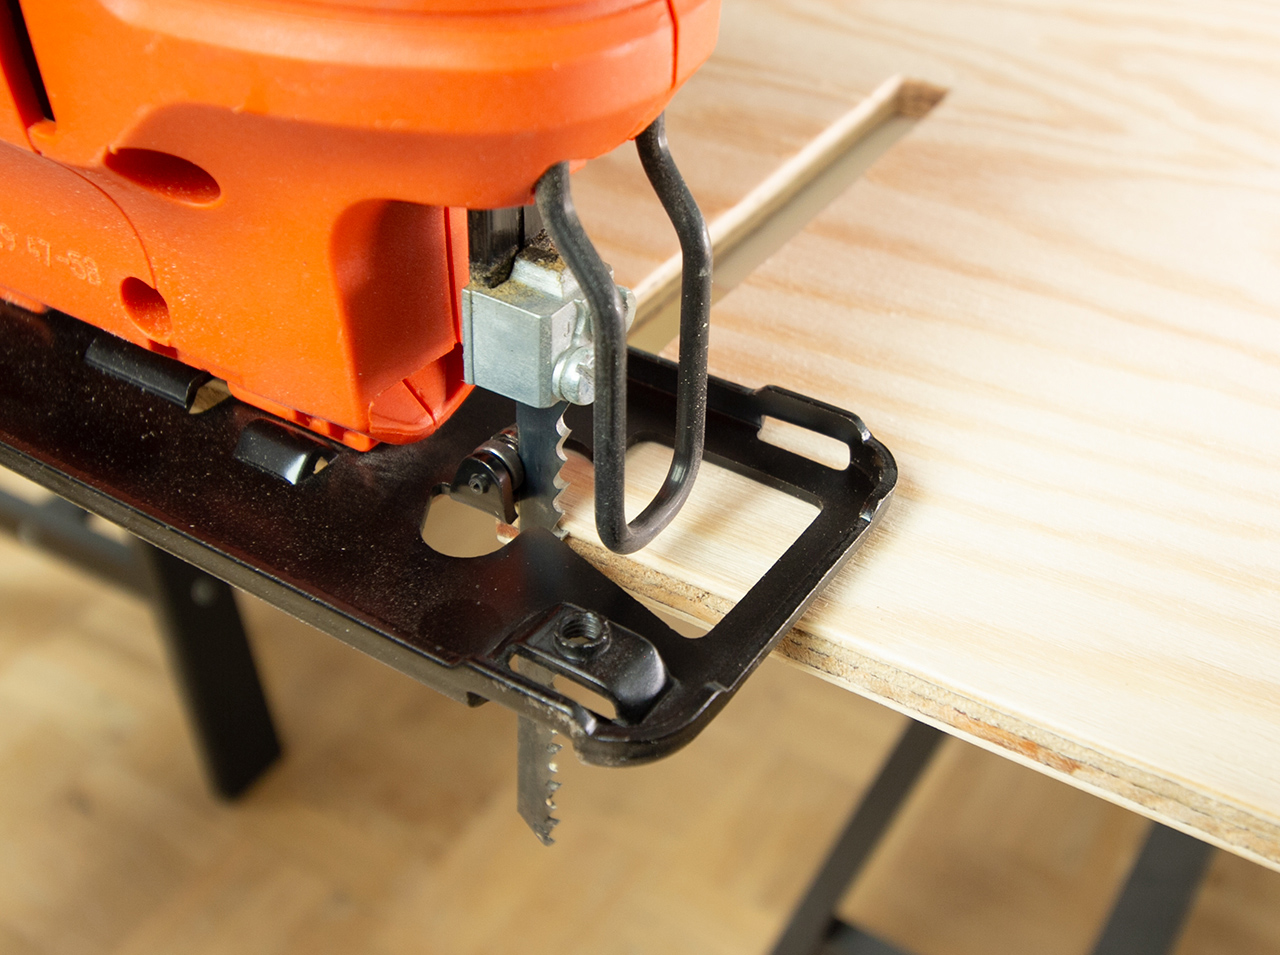 Step 2
Now saw out the drawn areas so that the two boards can be joined together later.
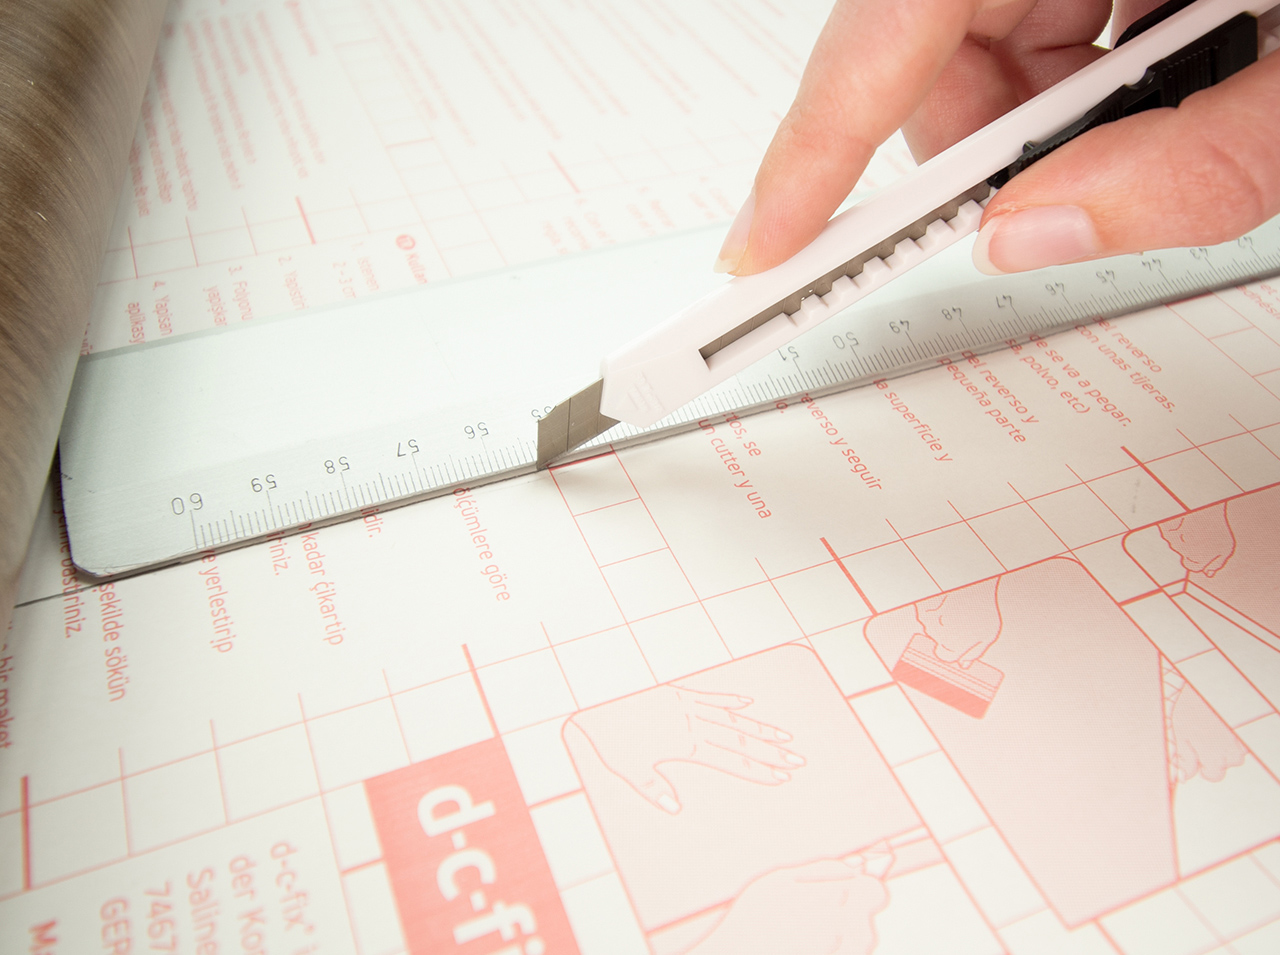 Step 3
Now it’s time for the oak look: Transfer the dimensions of the boards to the backing paper of the d-c-fix® adhesive foil in the oak design of your choice and cut the two pieces of foil to size with a little extra for gluing around the edges.
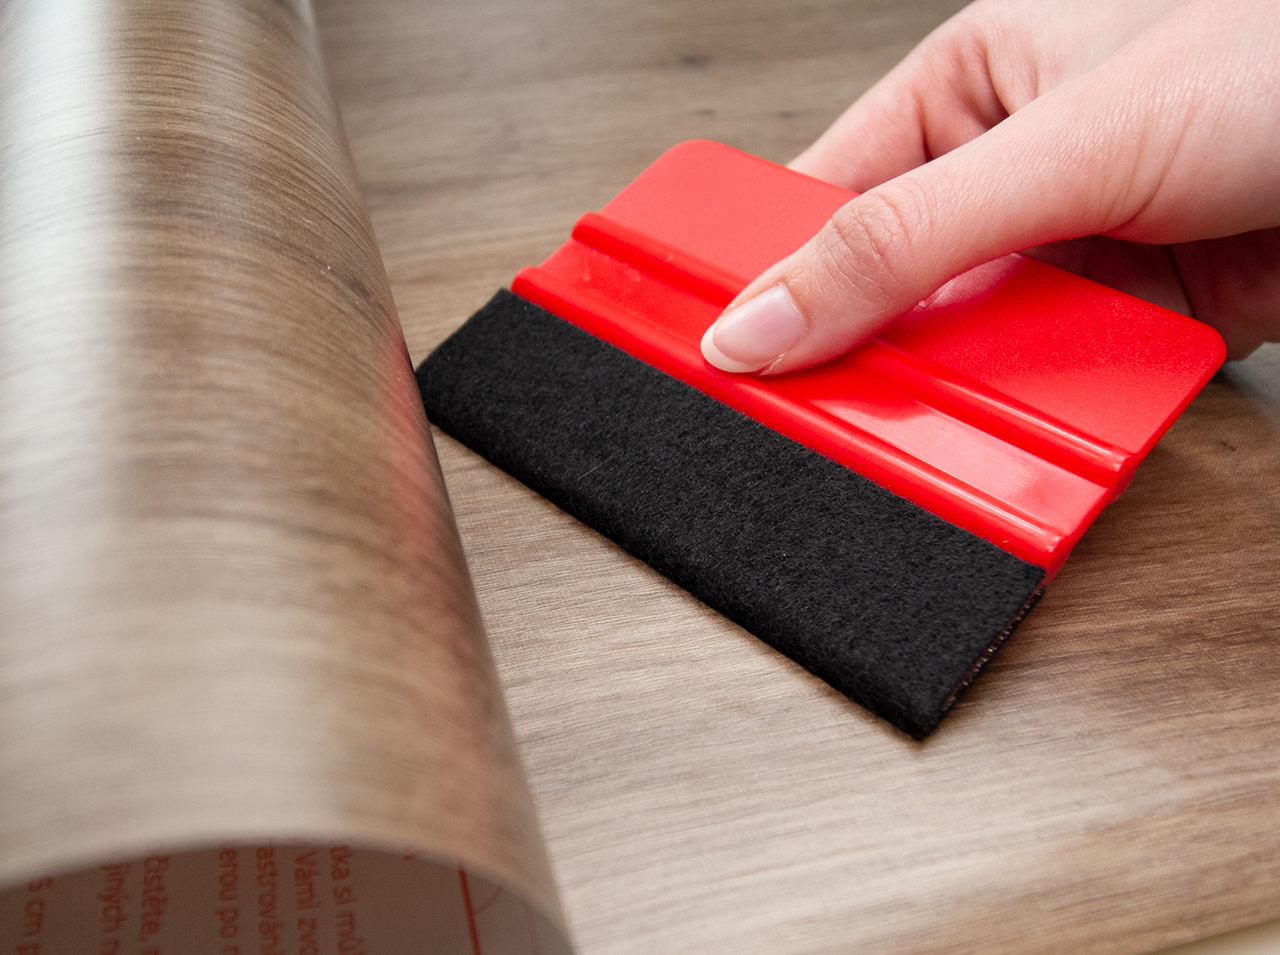 Step 4
Now apply the adhesive foil to the visible surfaces as well as to the edges and smooth everything down well using the doctor blade.
 Step 5
You can cut the corners with scissors to make it easier to glue them.
 Step 6
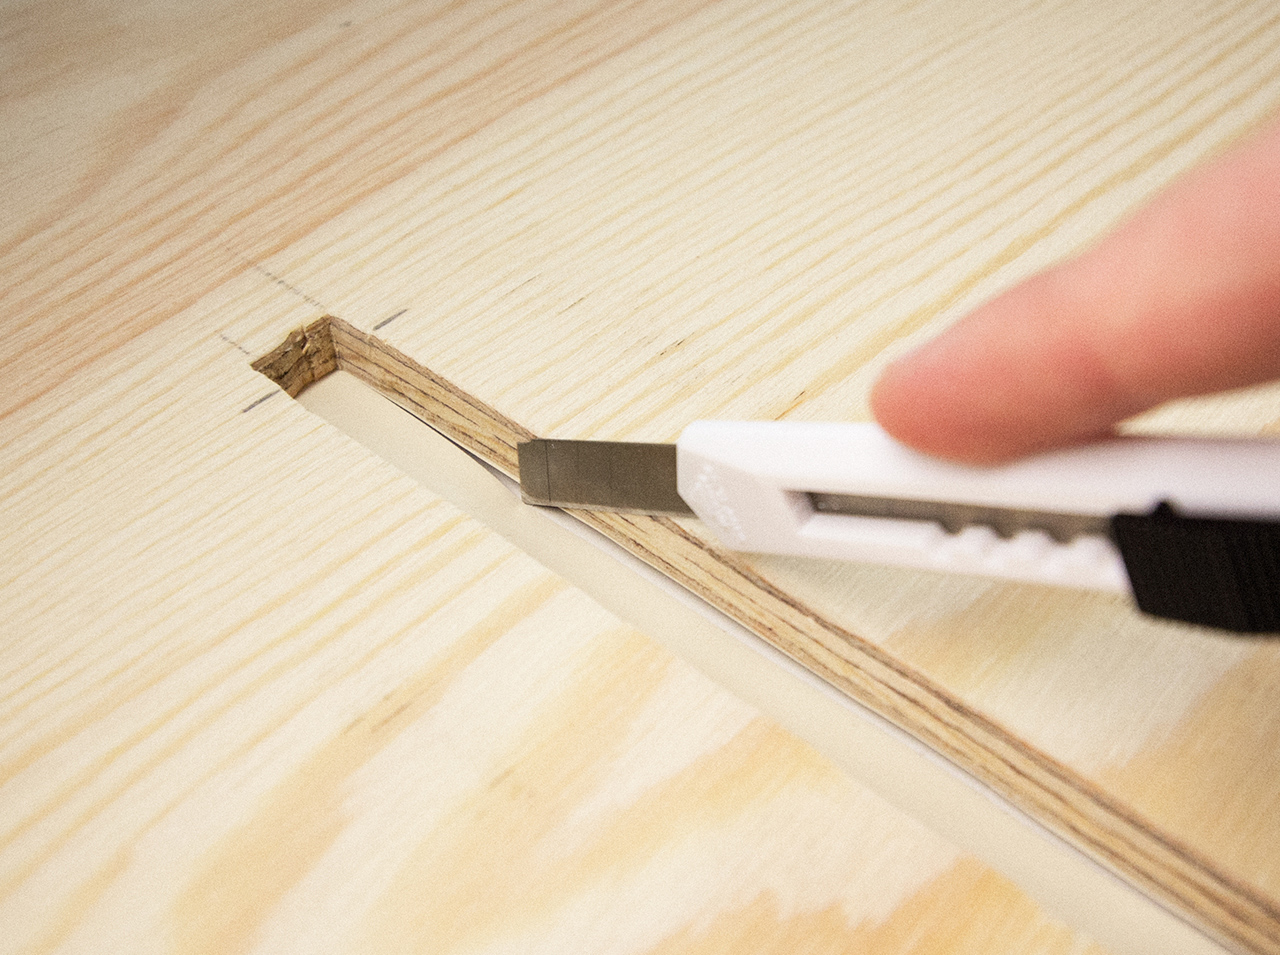
To finish, use the cutter to prick the places where the notches are and cut them free.
Next, stick the two glued boards together – and your organizer is ready!
You’re done!

2 Comments
Post A Comment
EXPERT ADVICE
Alternatively, you can use other adhesive foils in wood effect. Or you can combine the effect of different materials together - e.g. stone and wood or marble and plain color.
Preparation time
20 min
Execution
20 min
Difficulty level
Advanced
Costs
medium

Jo clayton
Posted at 12:42h, 12 MayIs this suitable to put on inside of conservatory roof to stop sun glare?
Lesterpax
Posted at 17:20h, 16 JulyQuickly you have answered…