You will need…


Enter the search term and press "ENTER" .
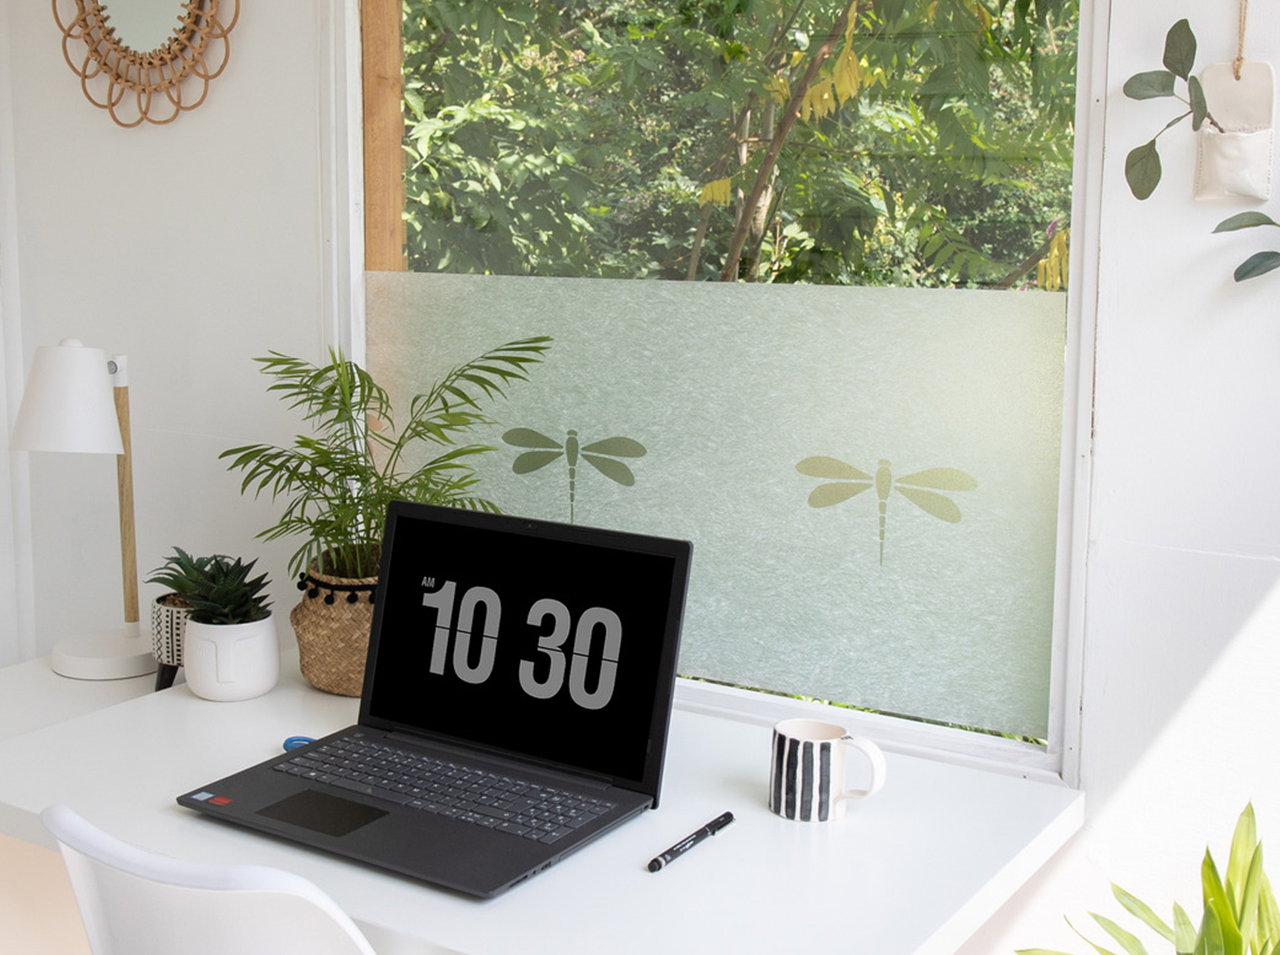
DIY privacy protection: Your windows will love Nibella!
Project from Eva - 0 CommentsGenerously-dimensioned windows are a wonderful feature, especially in living and dining areas as well as in the home office, because looking outside makes working more relaxed and inspired. However, in combination with neighbors, busy environments or living on the ground floor or in the basement, large windows will sooner or later raise the issue of effective privacy protection. After all, as much as we love a bright living space, we also want to enjoy some privacy! Those who do not like curtains, venetian or roller blinds often struggle to find an effective solution. But not with us! Because we have the perfect, easy-to-implement strategy for effective and beautiful privacy protection: With the d-c-fix® Static Premium Nibella window film, which adheres statically, privacy protection is achieved in no time – and the delightful design with its large semi-transparent dragonflies brings a cheerful lightness to any window. So bring the dragonflies onto your windows – and the keep the prying eyes out!
The dragonflies are here – beautiful views and super privacy in one!
- A roll of d-c-fix® Static Premium Nibella
- d-c-fix® application kit with scraper and utility knife
- Scissors
- Measuring tape
- d-c-fix® mounting liquid / spray bottle with water
- Cleaning cloth
Let’s go
 Step 1
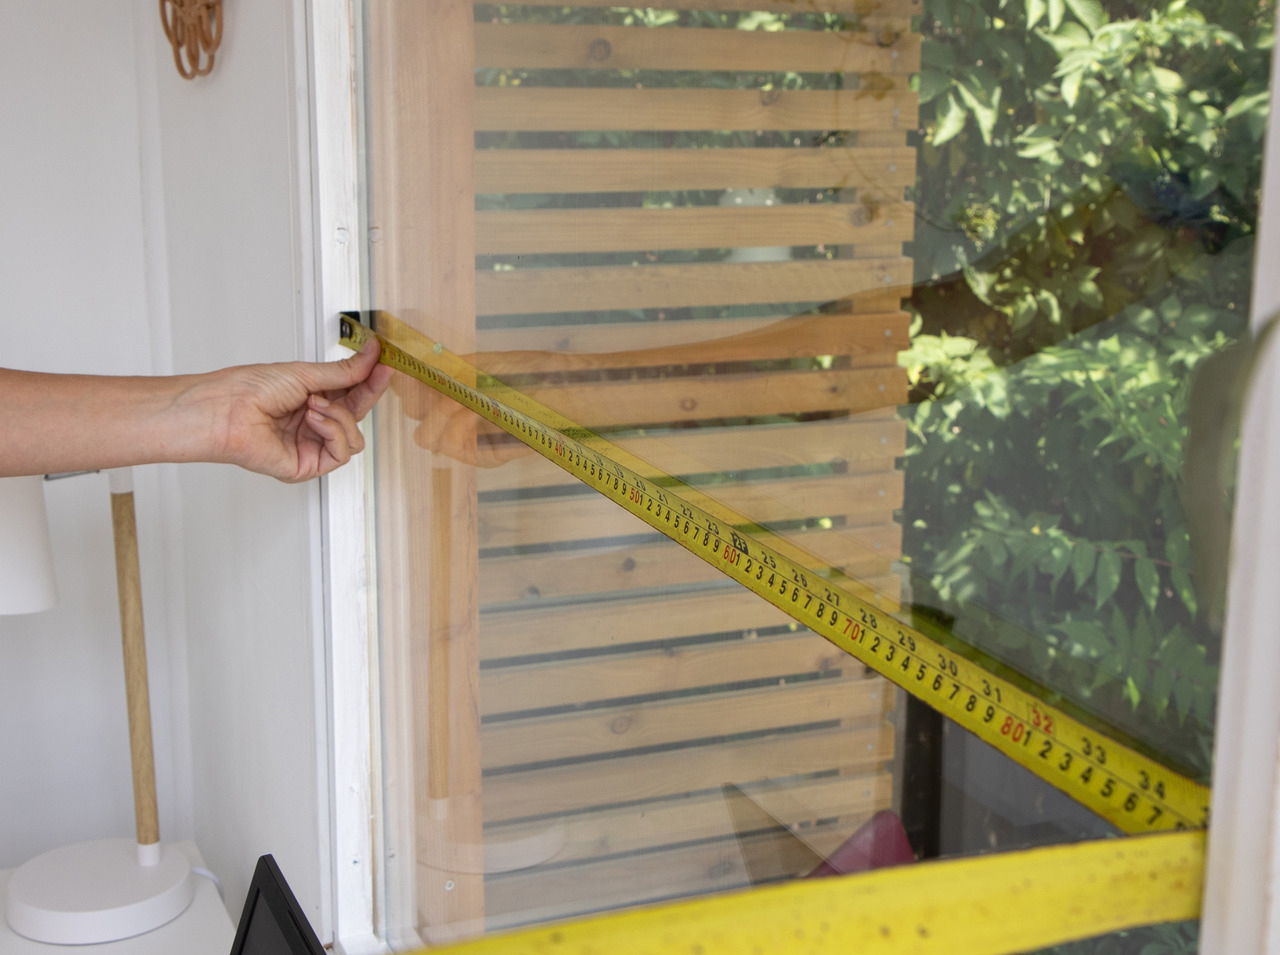
Measure the dimensions of the window surface to be covered and transfer them onto the backing paper of the Nibella film. When cutting, make sure that you cut away an additional 2–3 mm from the left and right edges to ensure some clearance from the window seals.
 Step 2
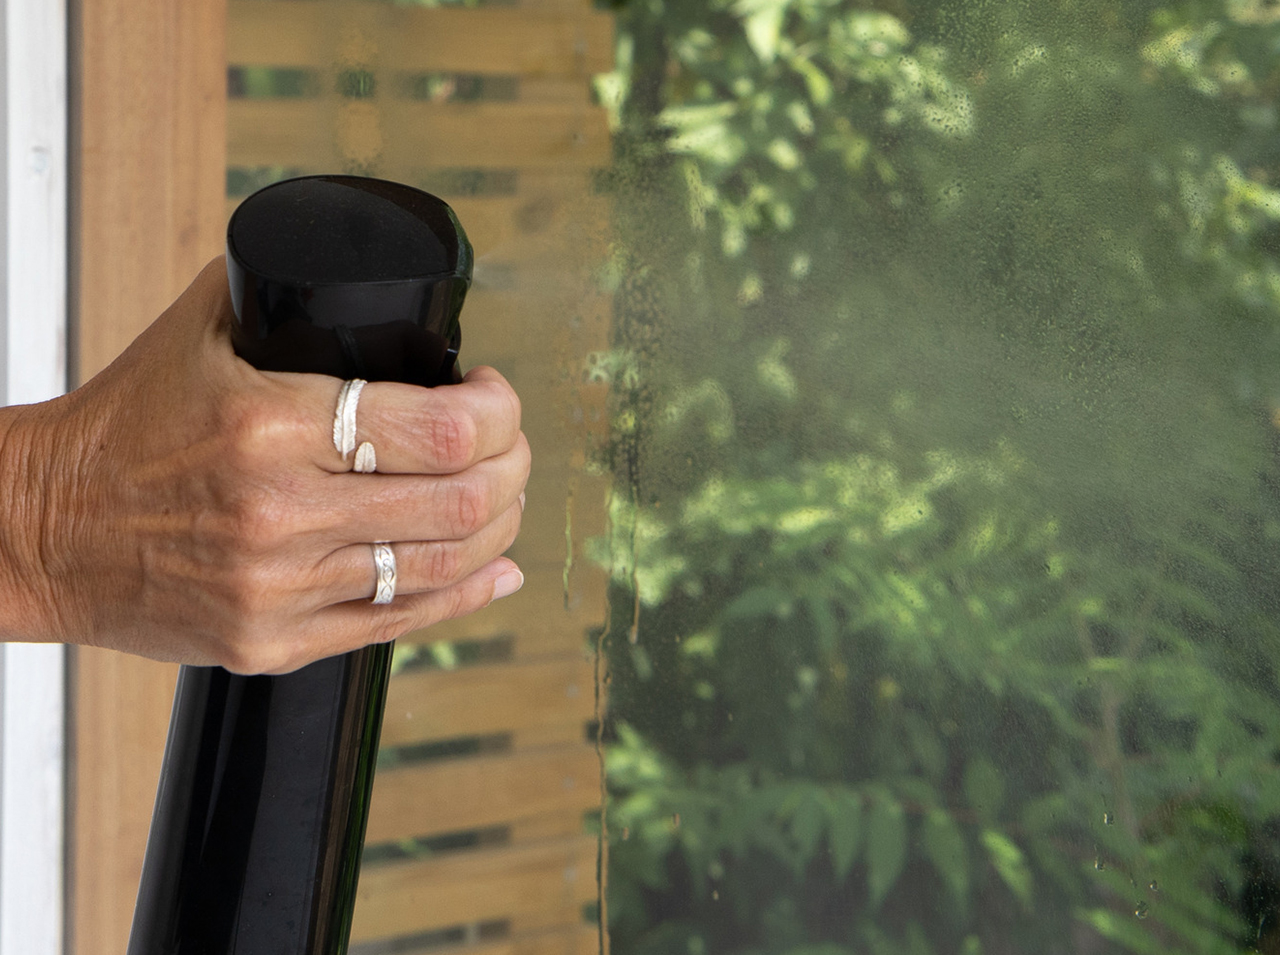
Now it is time to prepare the window: Thoroughly clean the glass to ensure that it is completely free of dust and dirt of any kind. Next, generously spray the glass surface with water/d-c-fix® application fluid until no more dry areas are visible.
 Step 3
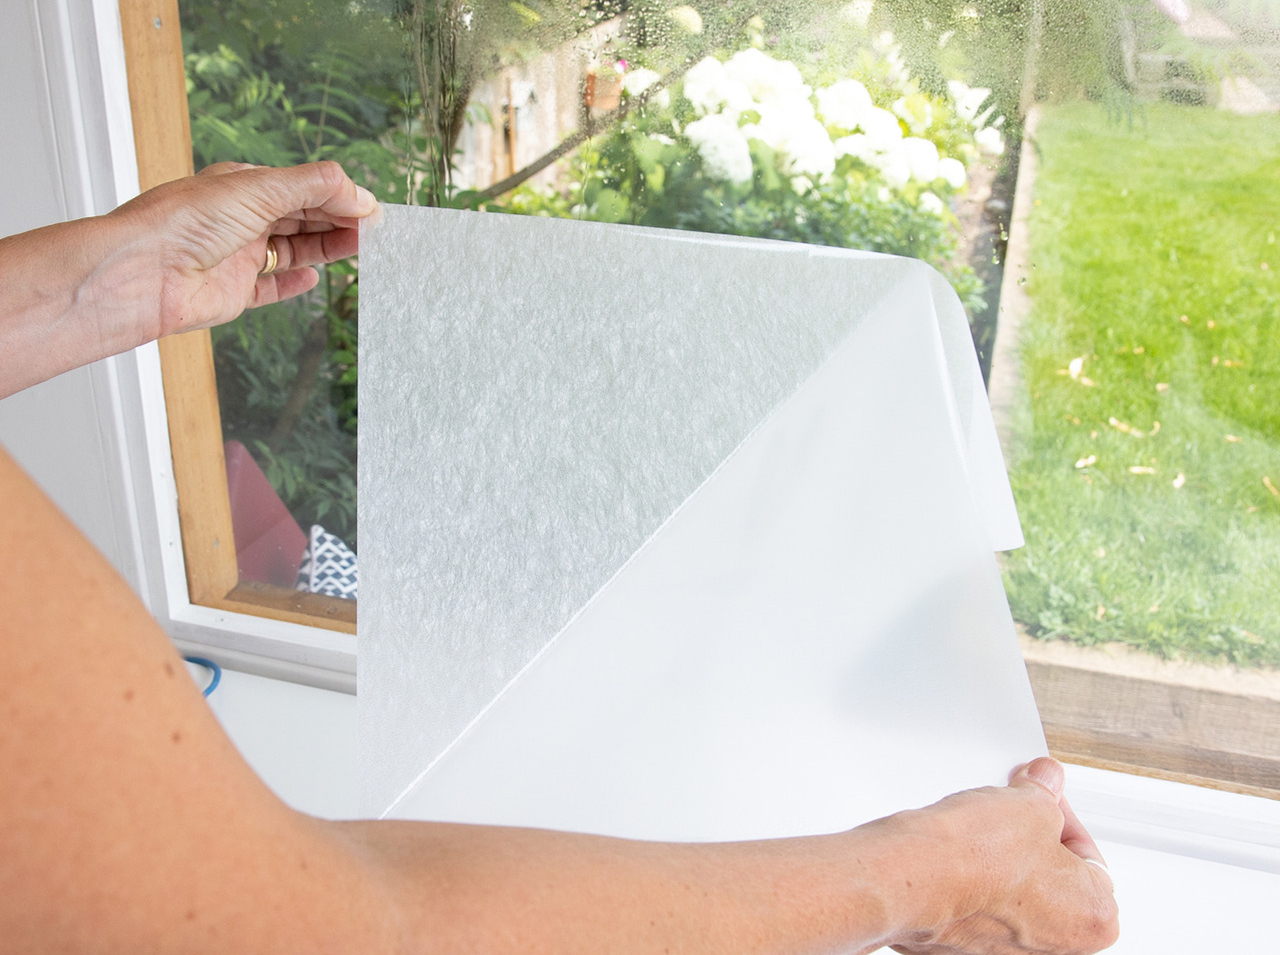
Then remove the backing paper from the piece of film and apply the film onto the window pane. Ensure sufficient clearance from the window seals – also at the bottom!
 Step 4
Once the privacy film is in the correct position, use the scraper to squeeze out the application fluid / water from between the glass surface and the window film. The best way to do this is to work outward from the center applying light pressure. To finish, use a cloth to rub the window dry: Your DIY privacy screen is complete!
You’re done!
Post A Comment
EXPERT ADVICE
The window film is initially in the wrong position? Don’t worry: Thanks to the film of water/application fluid, you can easily move the window film. If this is not possible, remove the film completely, spray the window pane again and re-apply the film.
Preparation time
5 min
Execution
20 min
Difficulty level
Beginner
Costs
Low

No Comments