You will need…


Enter the search term and press "ENTER" .
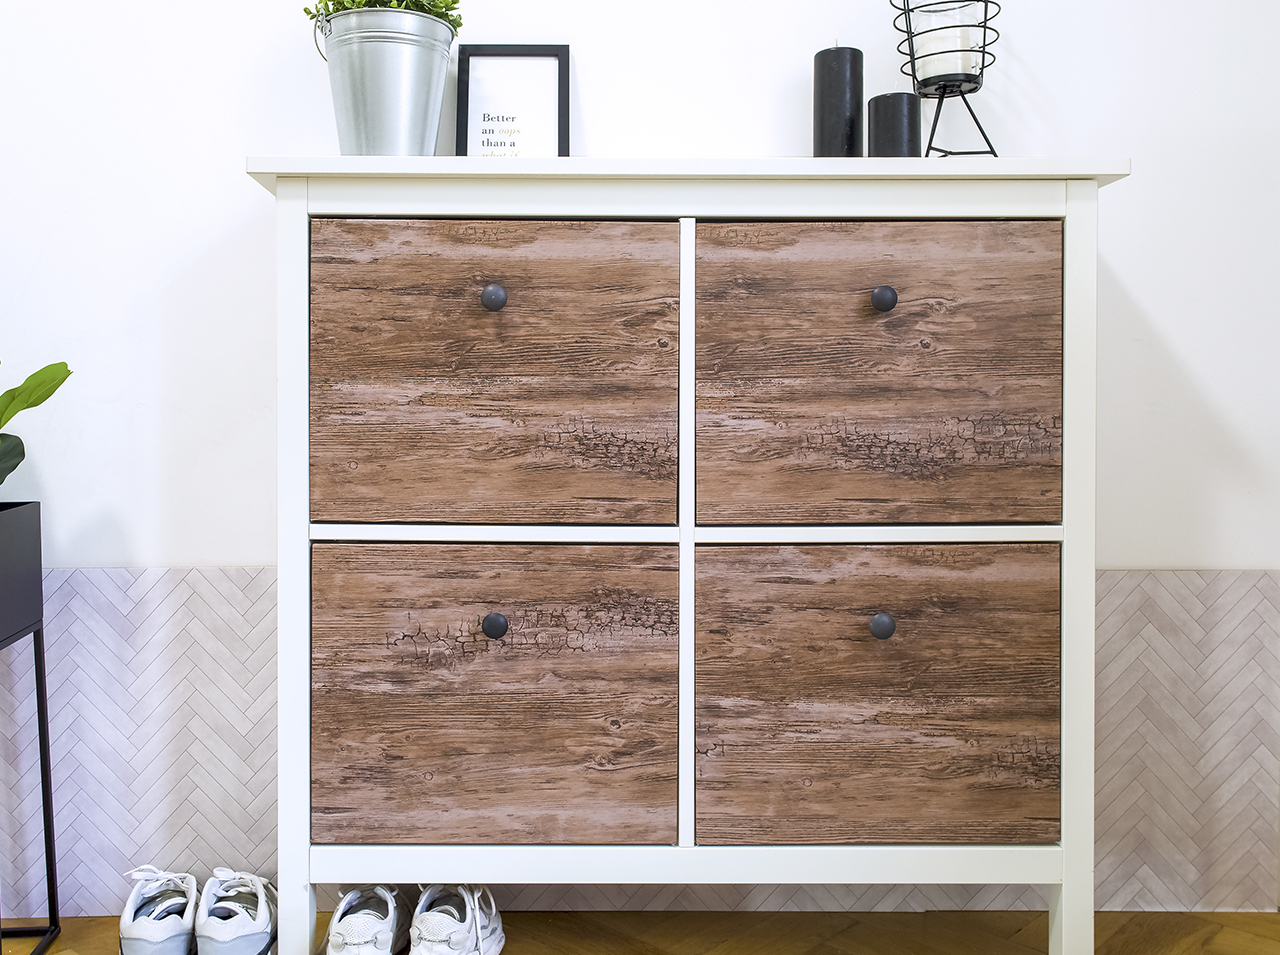
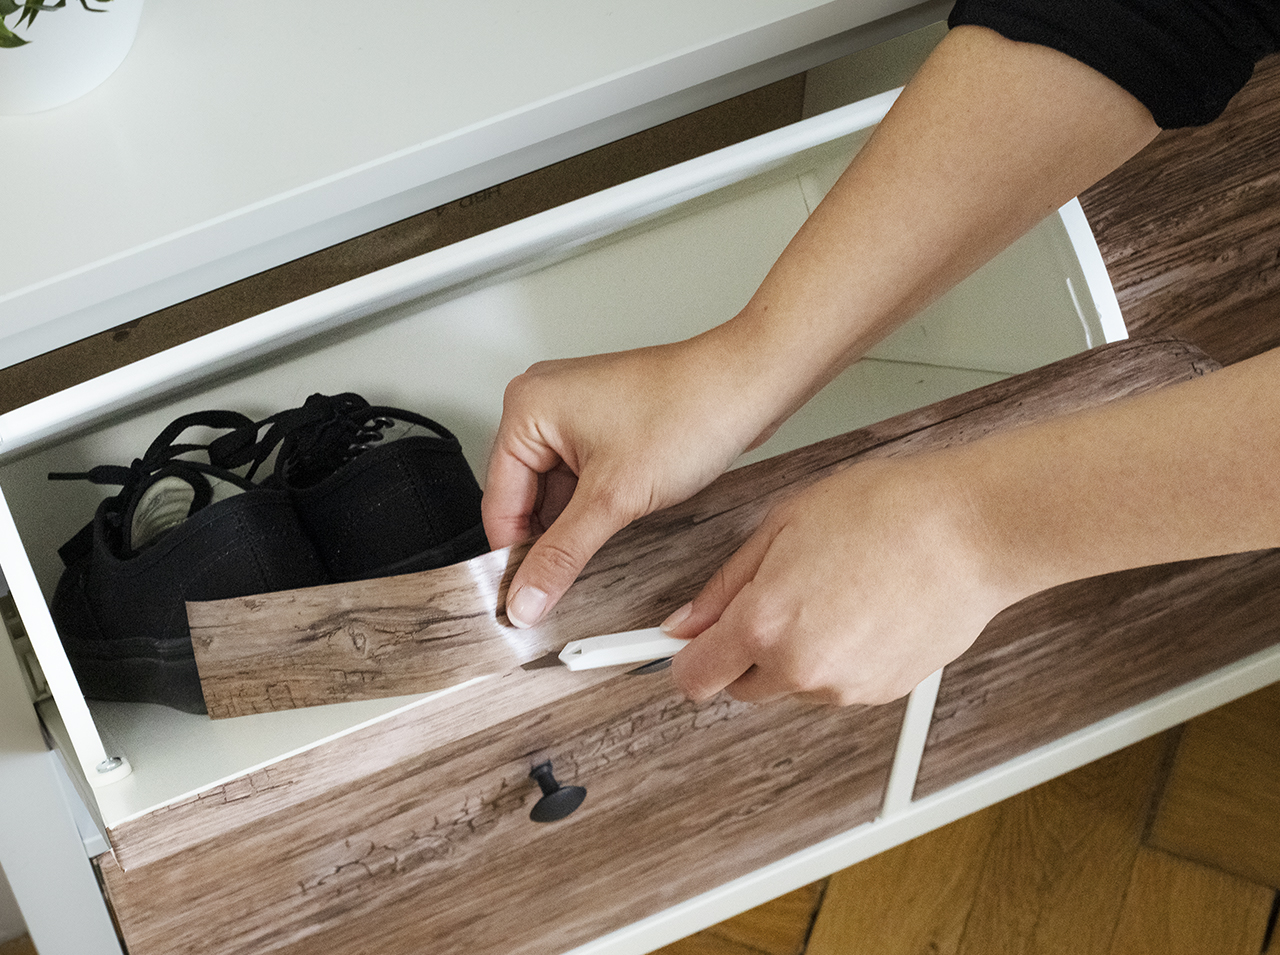
Upcycling DIY: Make your shoe rack chic in Scandi look!
Project from Eva - 0 CommentsThe nicest way to say “Welcome!” to yourself and visitors is a welcoming hallway. And when you say “welcoming,” you inevitably think of a modern, cozy Scandinavian look that uniquely blends modernness and comfort.
That is why the Scandi update in your home begins with DIY upcycling of the shoe cabinet which can be found in most entrance areas. With the d-c-fix® Rustic Wood adhesive foil in a vibrant wooden look, you can give your shoe rack that Scandinavian touch – which also works well on other furniture.
The Rustic Wood look does your shoe rack proud!
- d-c-fix® Rustic Wood
- Pencil
- Scissors
- Measuring tape
- Boxcutter
- Scraper
Let’s go
 Step 1
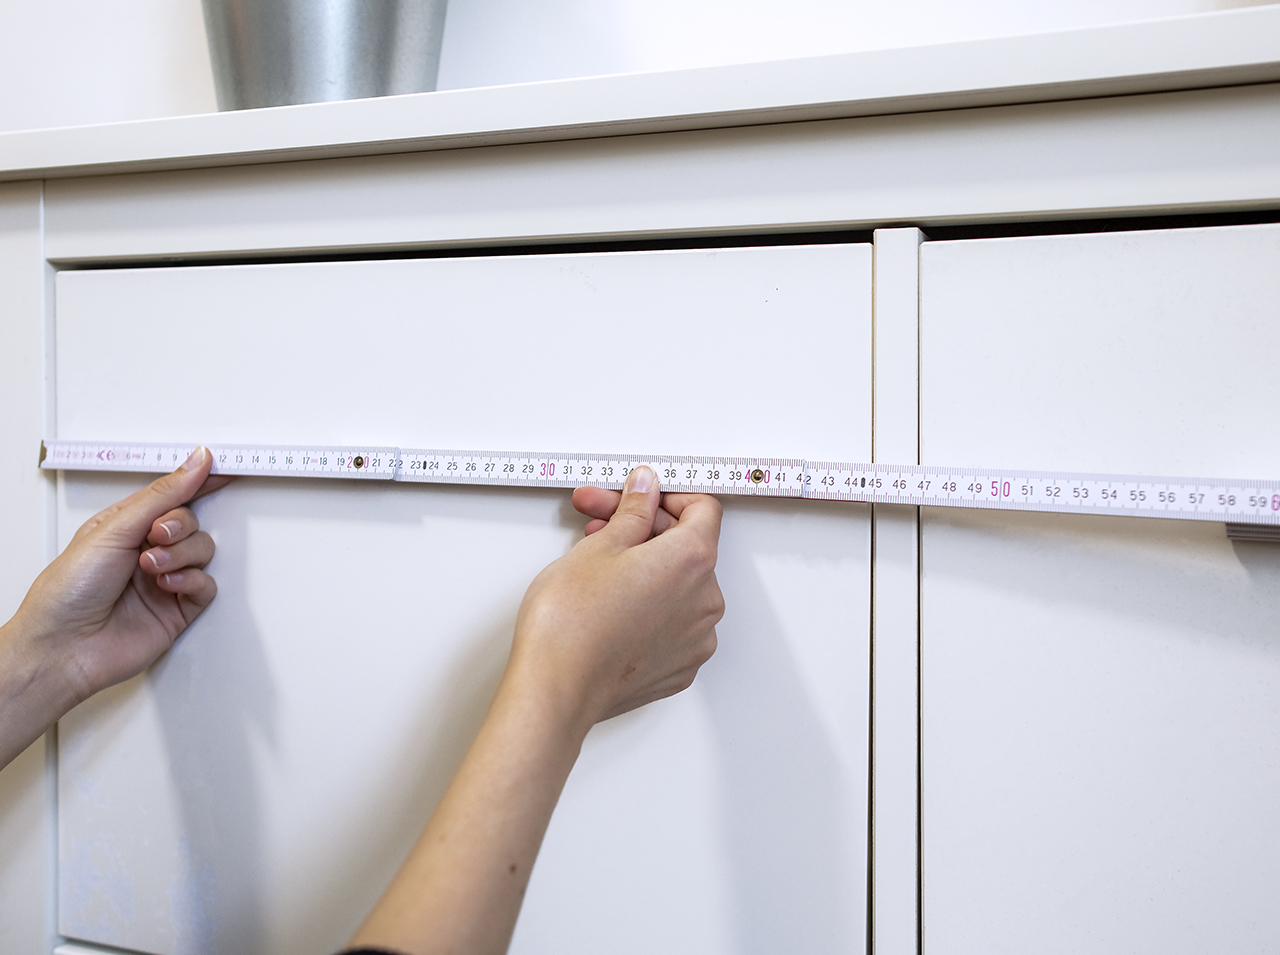
Measure the shelf of the shoe rack.
 Step 2
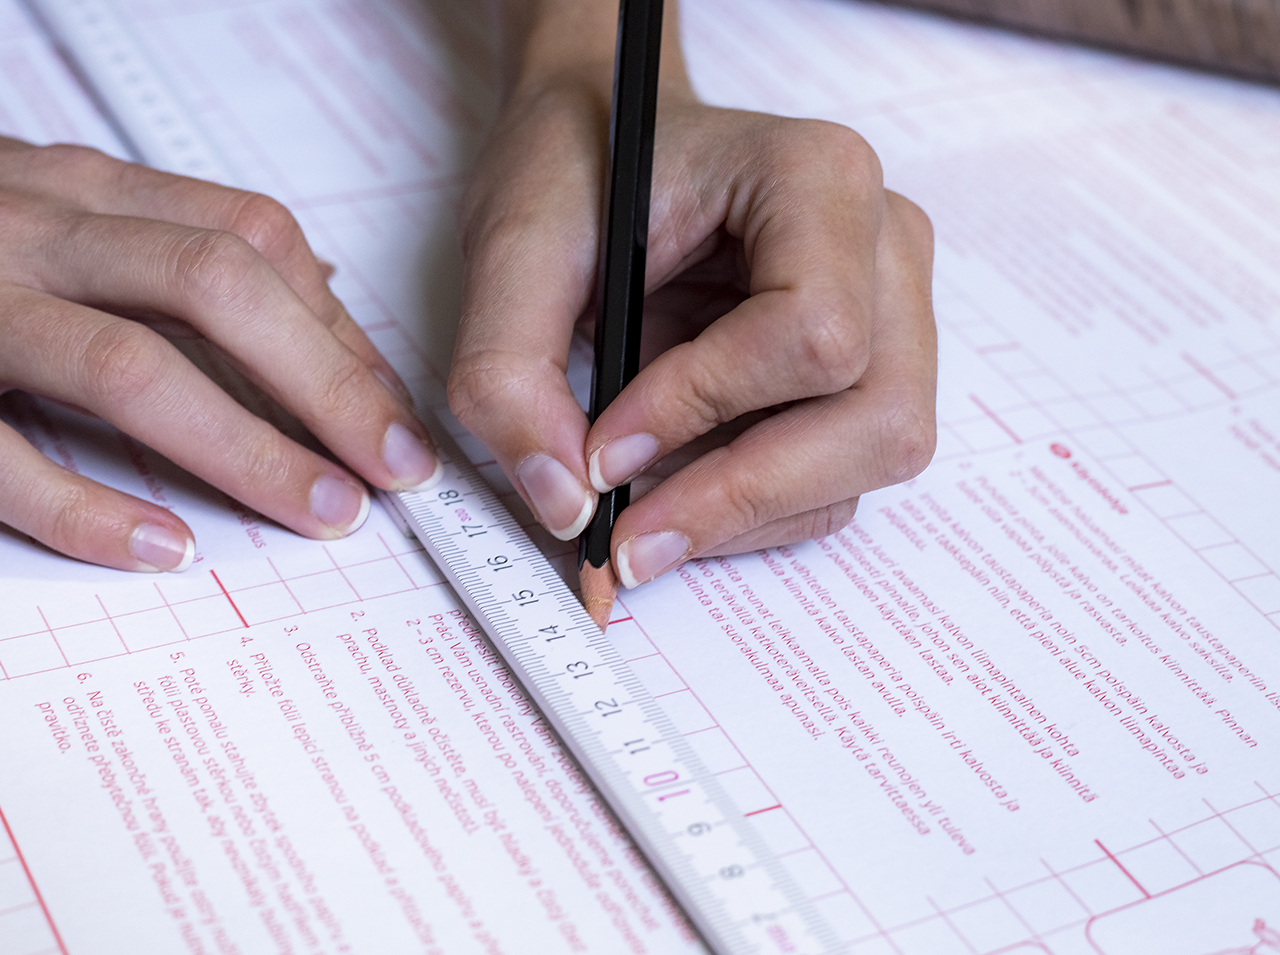
Transfer the dimensions with a margin of about 1 cm on all sides to the backing paper of the Rustic Wood adhesive foil and then cut it to size.
 Step 3
To apply the foil, remove about a handsbreadth of the backing paper.
 Step 4
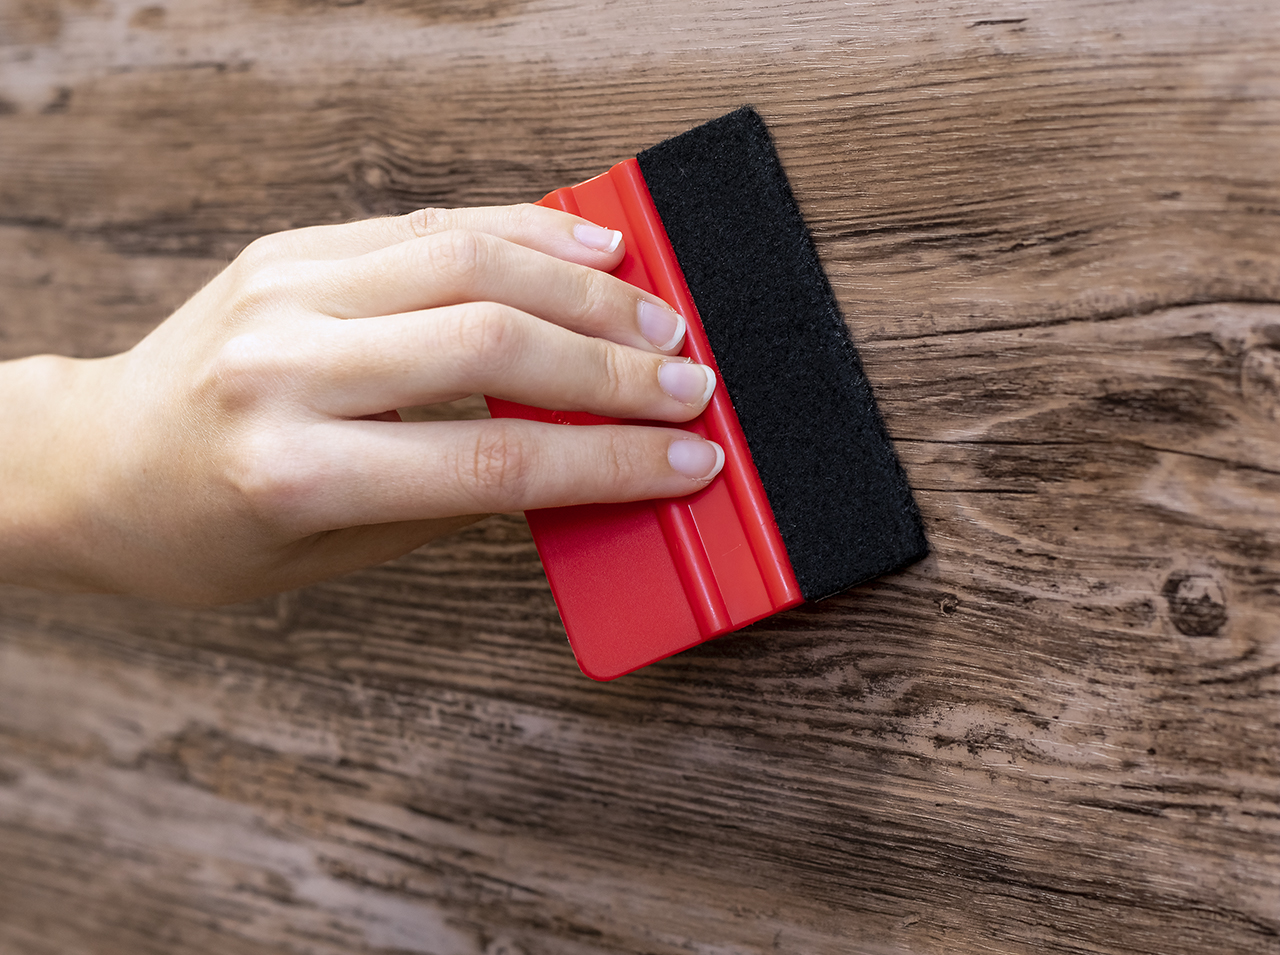
Apply the adhesive foil to the edge of the shelf with a slight overlap and use the scraper to press the foil down firmly, one piece at a time.
 Step 5
Cut any overlapping adhesive foil diagonally at the corners and then carefully press down around the corners and edges.
 Step 6
If there is still some excess foil, remove it carefully with the boxcutter.
You’re done!

Post A Comment
EXPERT ADVICE
You will see: After your first furniture upcycling, youֺ will be hooked on the rustic but modern charm of the Scandi look!
Preparation time
5 min
Execution
20 min
Difficulty level
Beginner
Costs
Low
No Comments