You will need…


Enter the search term and press "ENTER" .
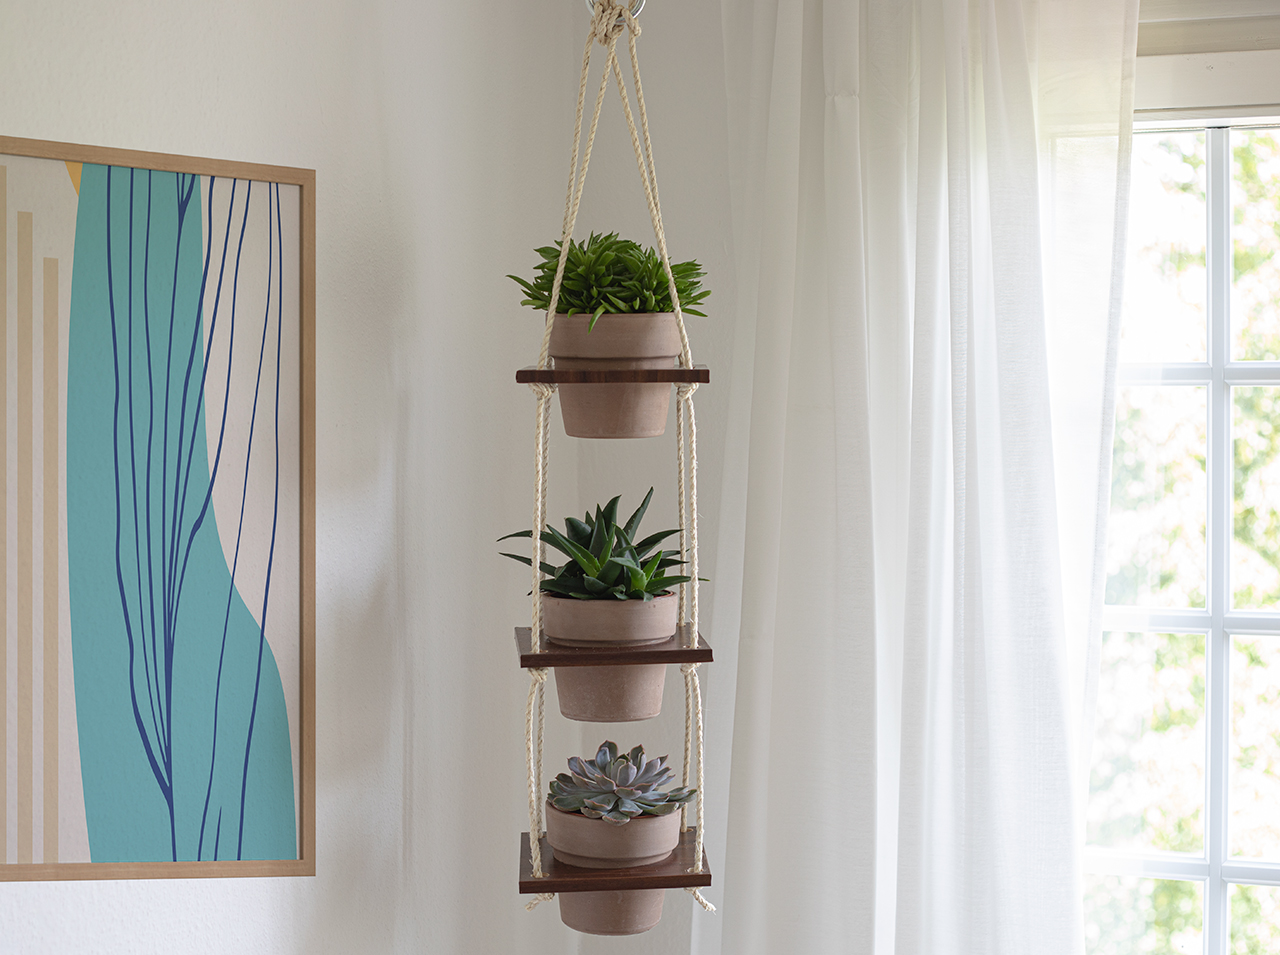
How-To: DIY hanging shelf for plants!
Project from Angelina - 0 CommentsLet’s admit it: We all need a little variety now and then! Ever thought that the plants in your flower pots may feel the same? We believe that our ingenious DIY hanging shelf in chic wood look with robust cords is just right for you as a plant lover. Because when it’s hanging, your favorite greenery looks even better, and creates an unexpectedly casual highlight in your home. Where do you want to hang your plants at your place? Find a nice spot and get started!
- d-c-fix® Walnut adhesive foil
- 3 equal size square wooden panels
- 3 pots for the plants
- Cord
- Metal ring
- Drill
- Jigsaw
- Sandpaper
- Rule
- Utility knife
- Doctor blade
- Pencil
Let’s go
 Step 1
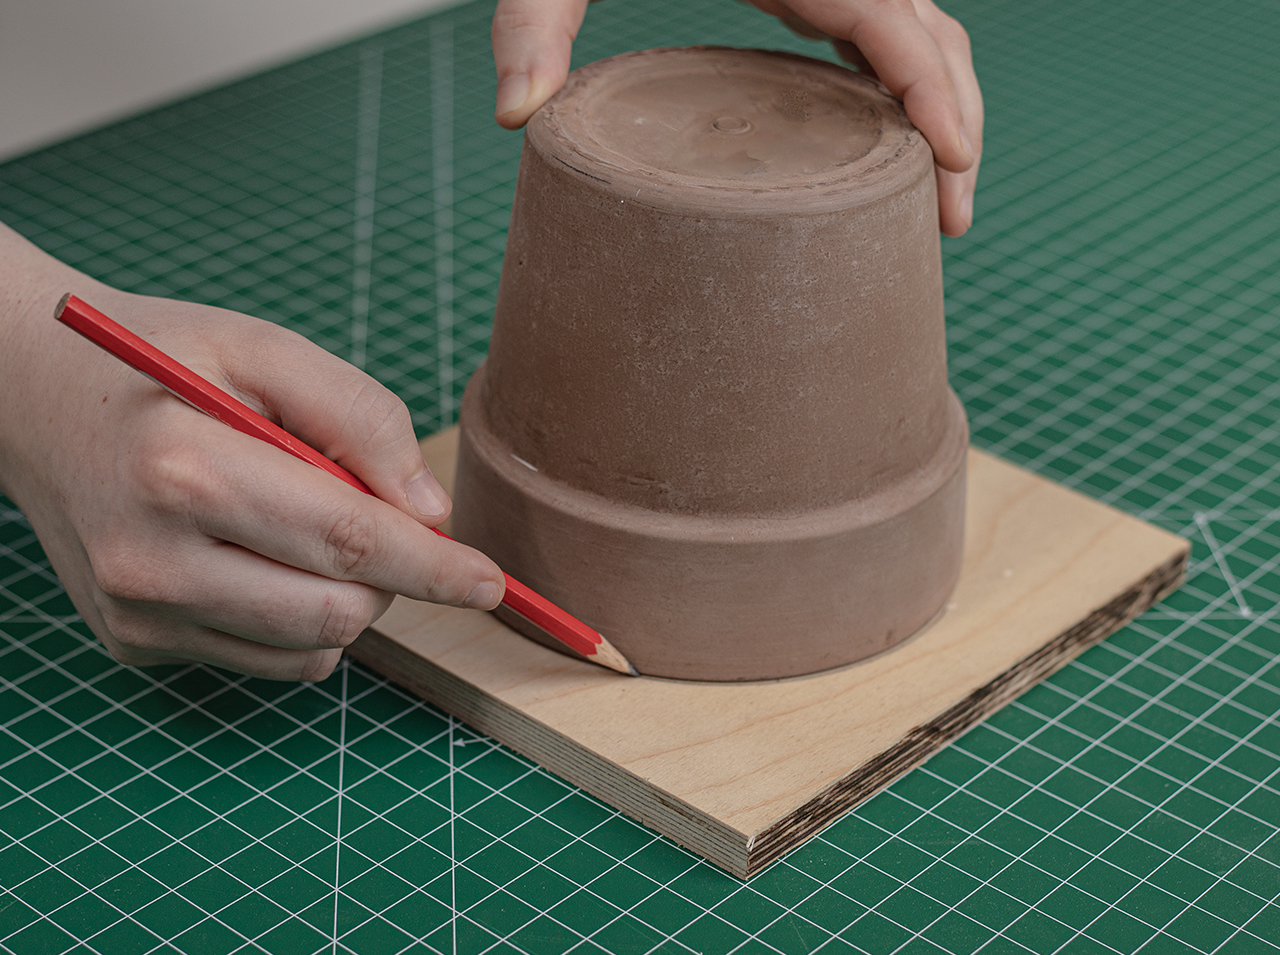
Place the plant pot in the center of the first square wooden plate and trace the outline in pencil. Then draw another circle 1/4 smaller in the center of the first circle. Repeat this with the other two wooden panels.
 Step 2
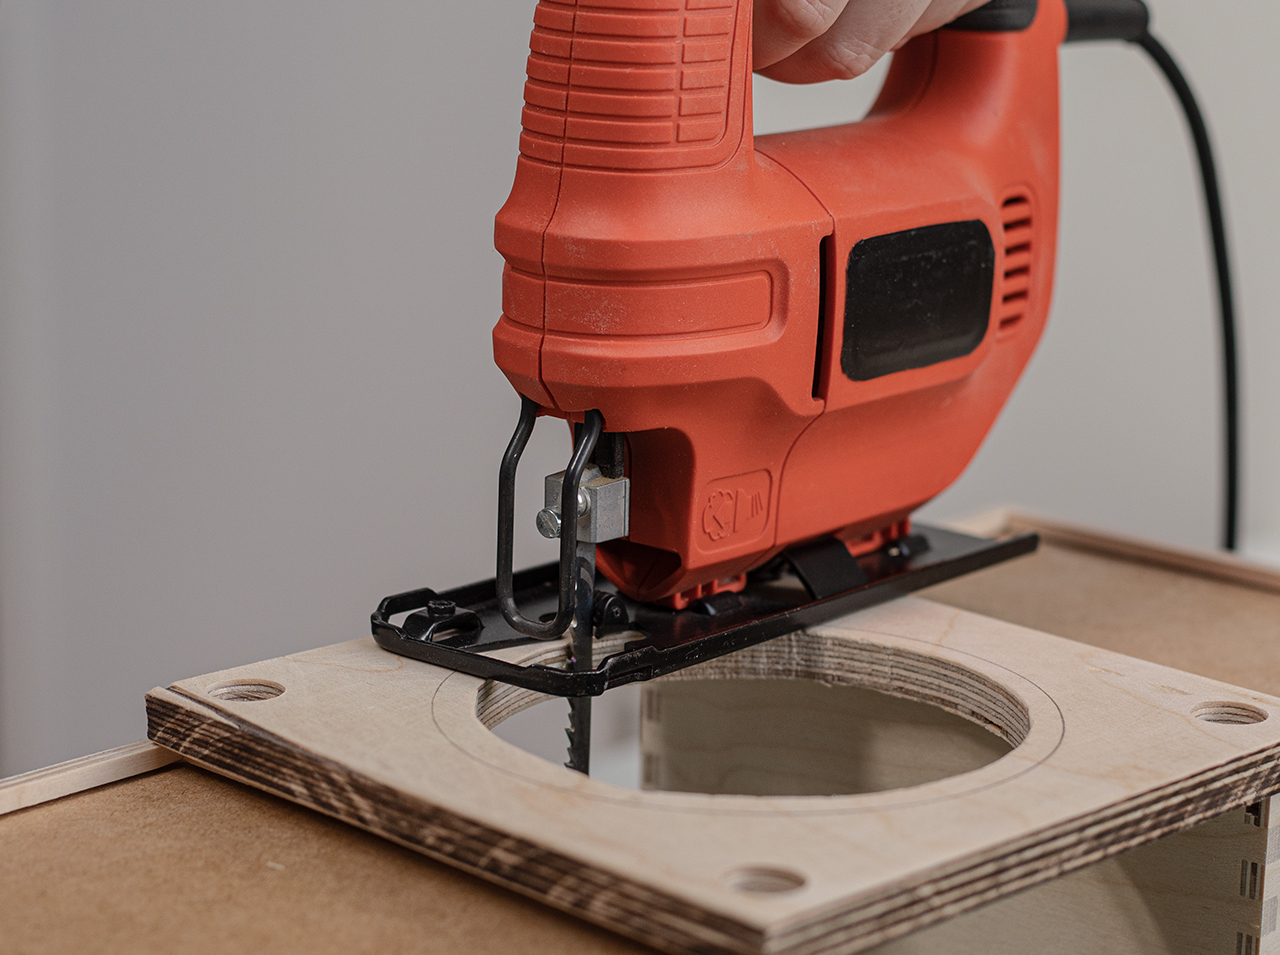
Now it’s time to cut out the smaller circle: To do this, use the drill to make a hole in the center. You can then insert the jigsaw into this to cut out the circle.
 Step 3
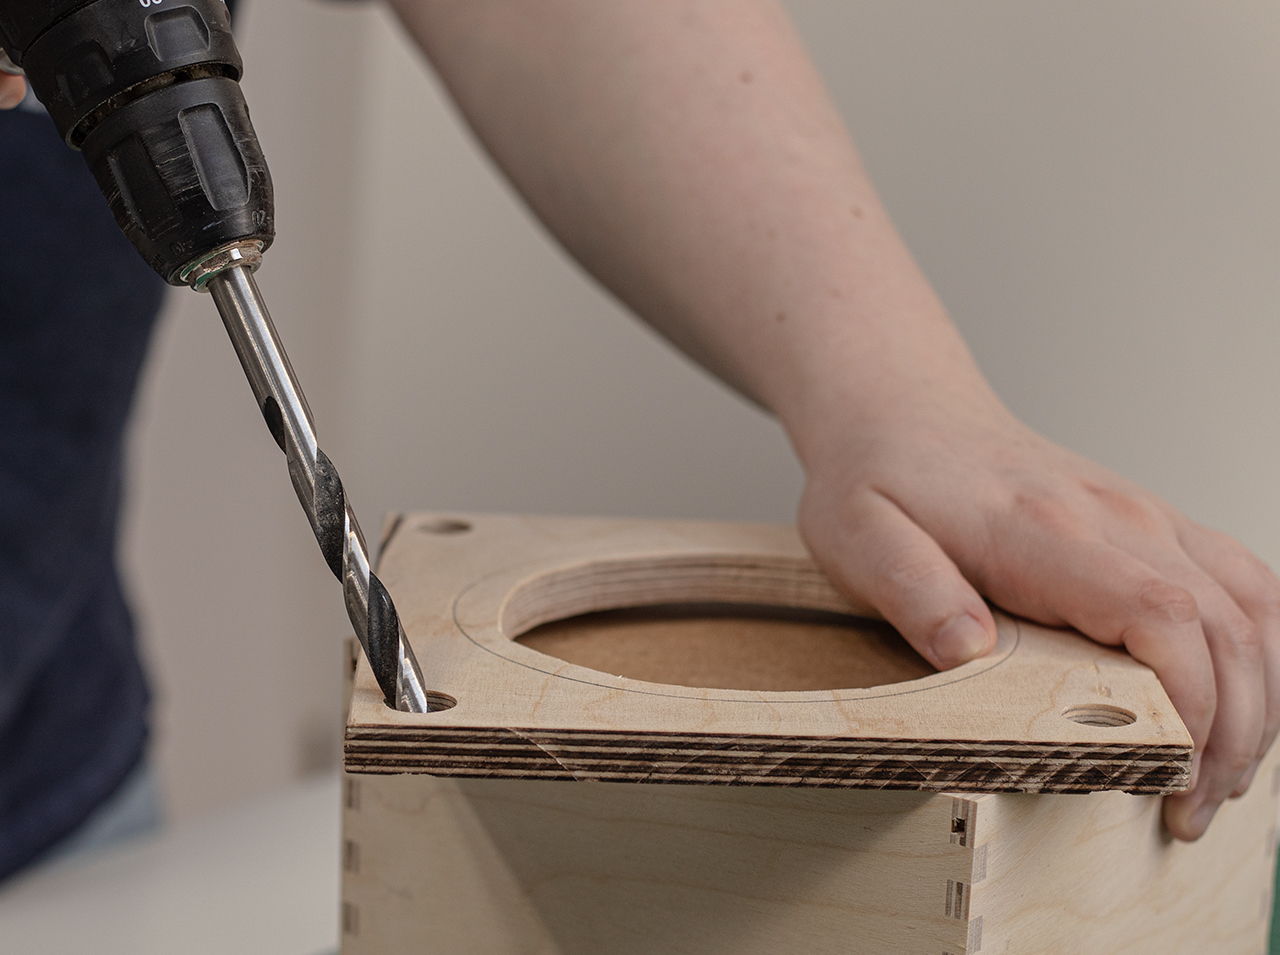
Drill holes in all four corners of each wooden panel. The cords are threaded through these holes at the end.
 Step 4
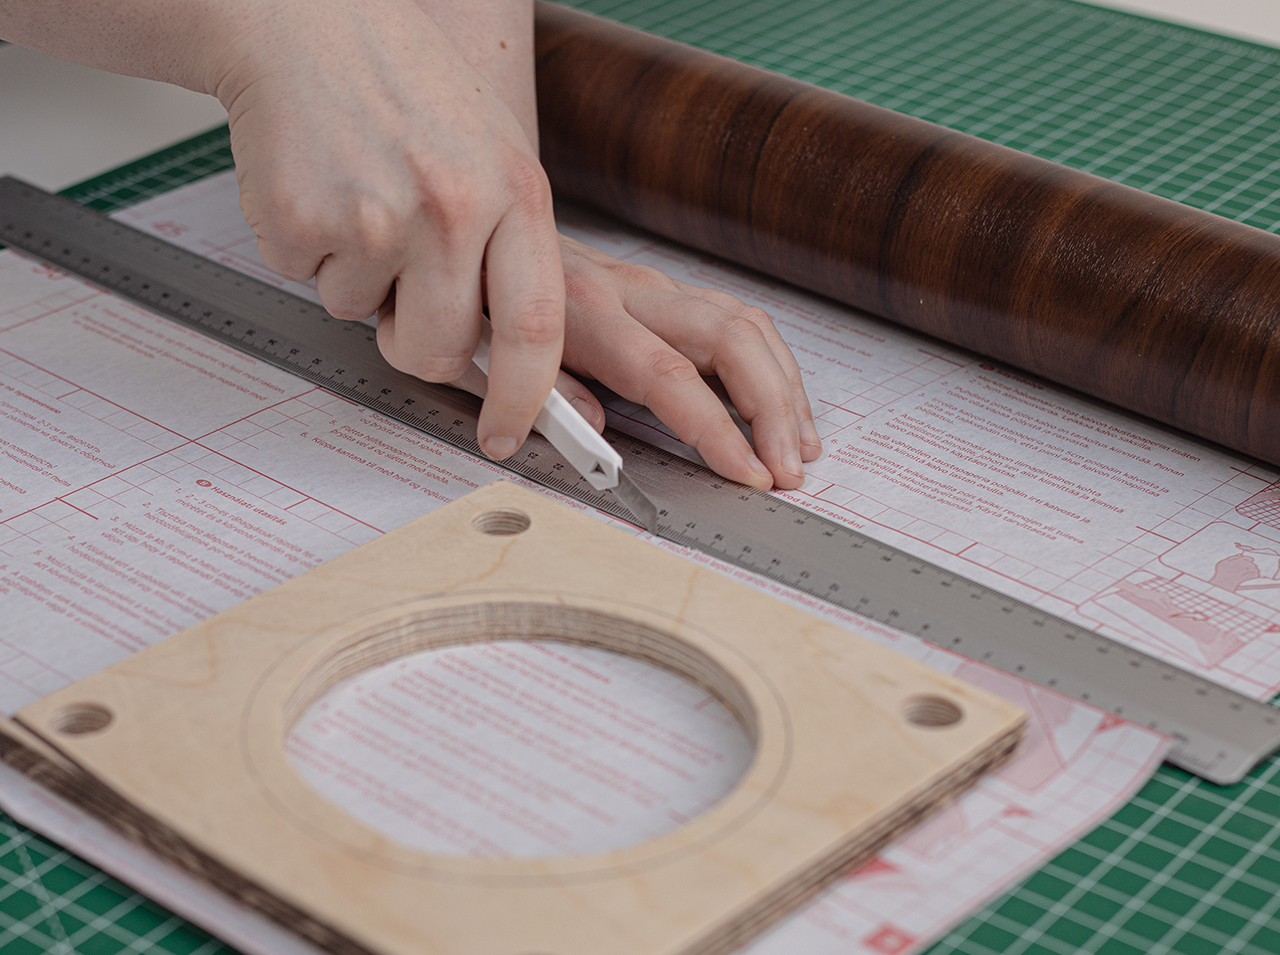
Now measure the square wooden panels and transfer the measurements to the backing paper of the Walnut adhesive foil. Trim the three pieces of adhesive foil to size.
 Step 5
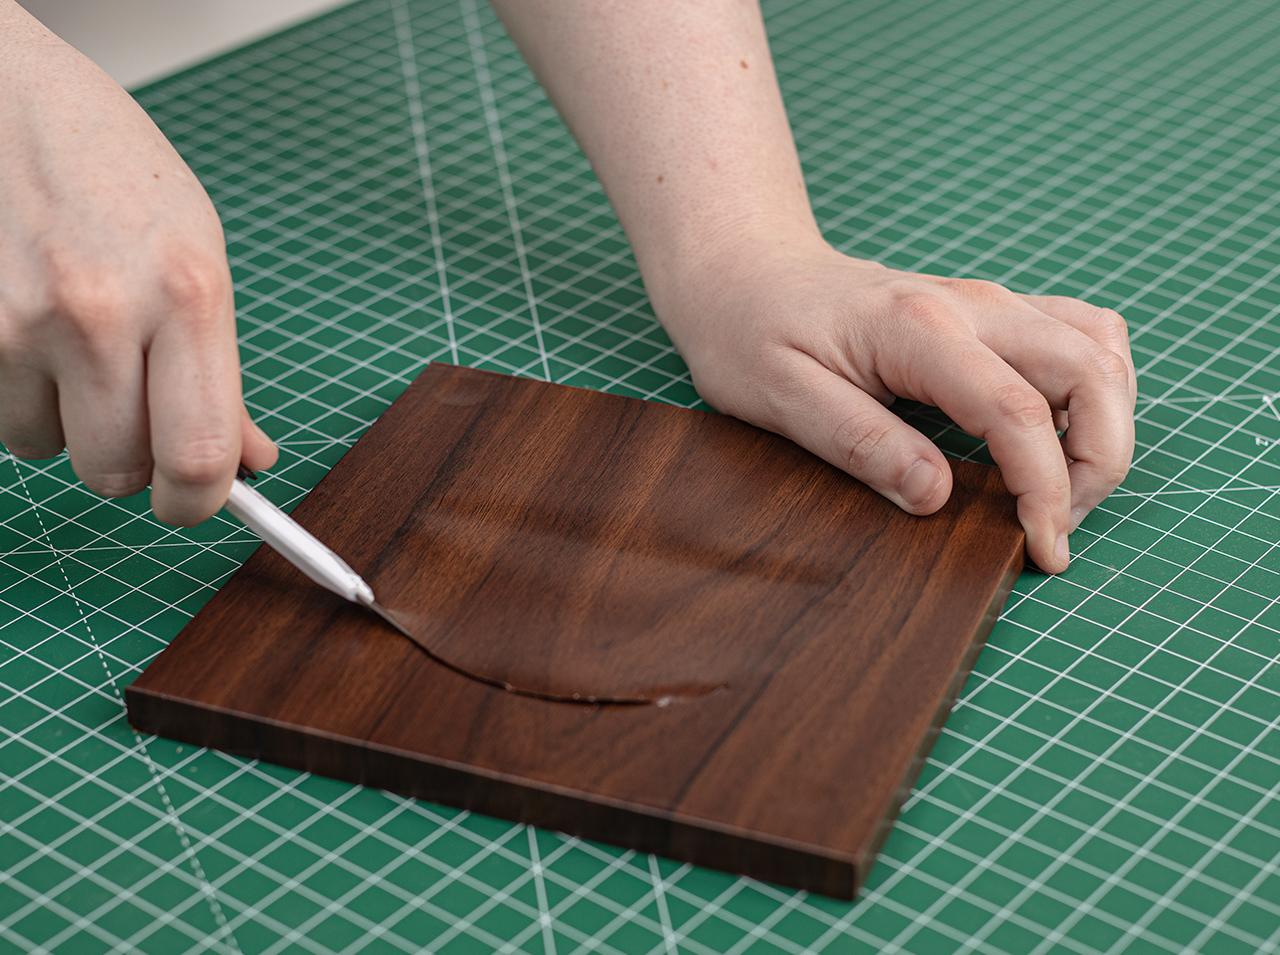
Now peel off the backing paper and apply the adhesive foil to the wooden panel. Cut out the circle in the middle and the holes for the cords with the utility knife.
 Step 6
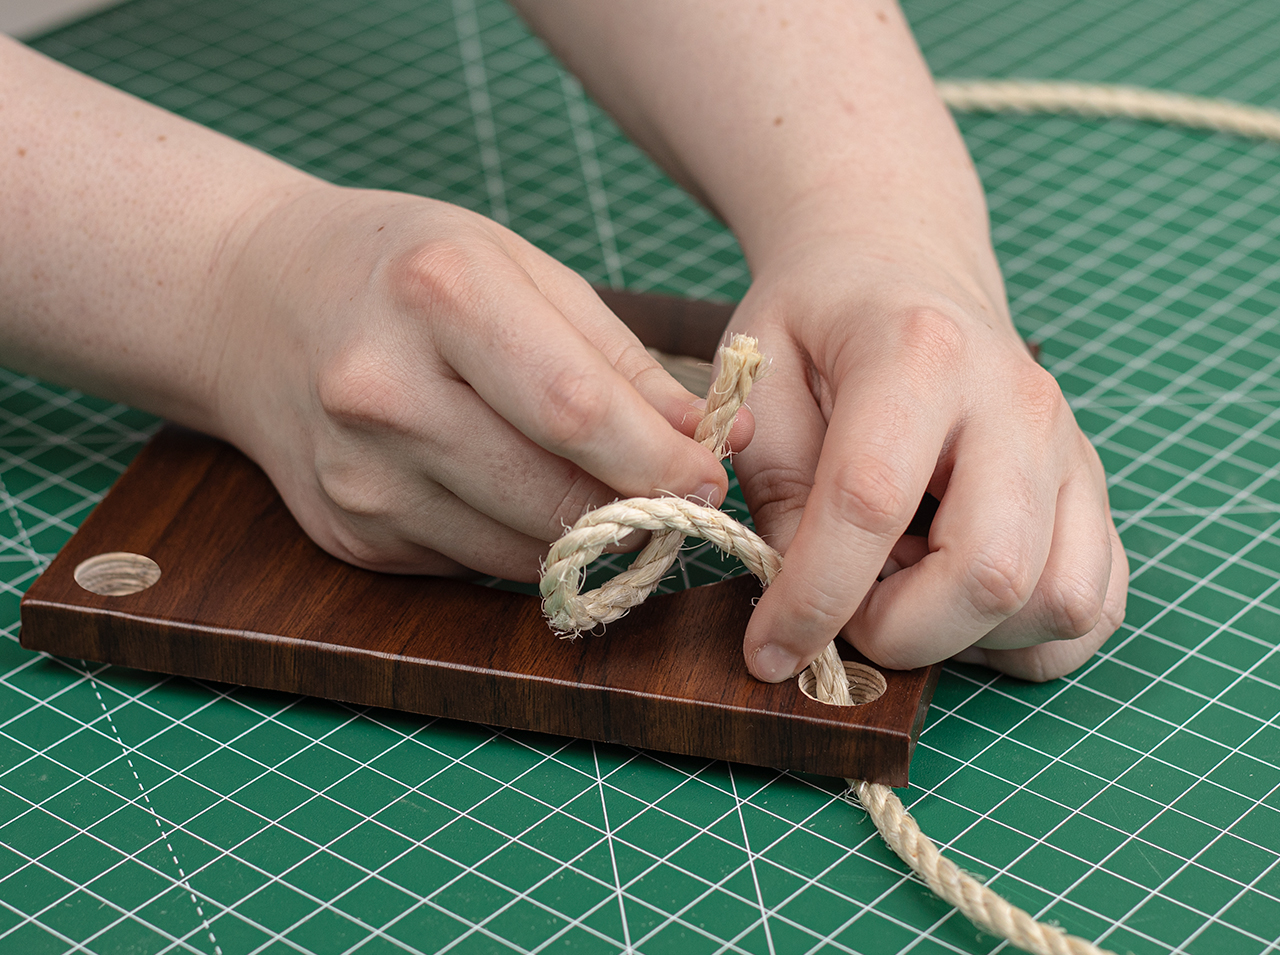
Cut four pieces of cord, each 120 cm long, and thread them through the holes of the first wooden square. Tie a knot at the end of each cord underneath the wooden panel to hold it in place. This wooden panel will become the bottom level of your hanging shelf.
 Step 7
Tie more knots in each rope at equal intervals and thread the next wooden square. Always check that the bottoms are reasonably straight and adjust if necessary by moving the knots until the distances are correct.
 Step 8
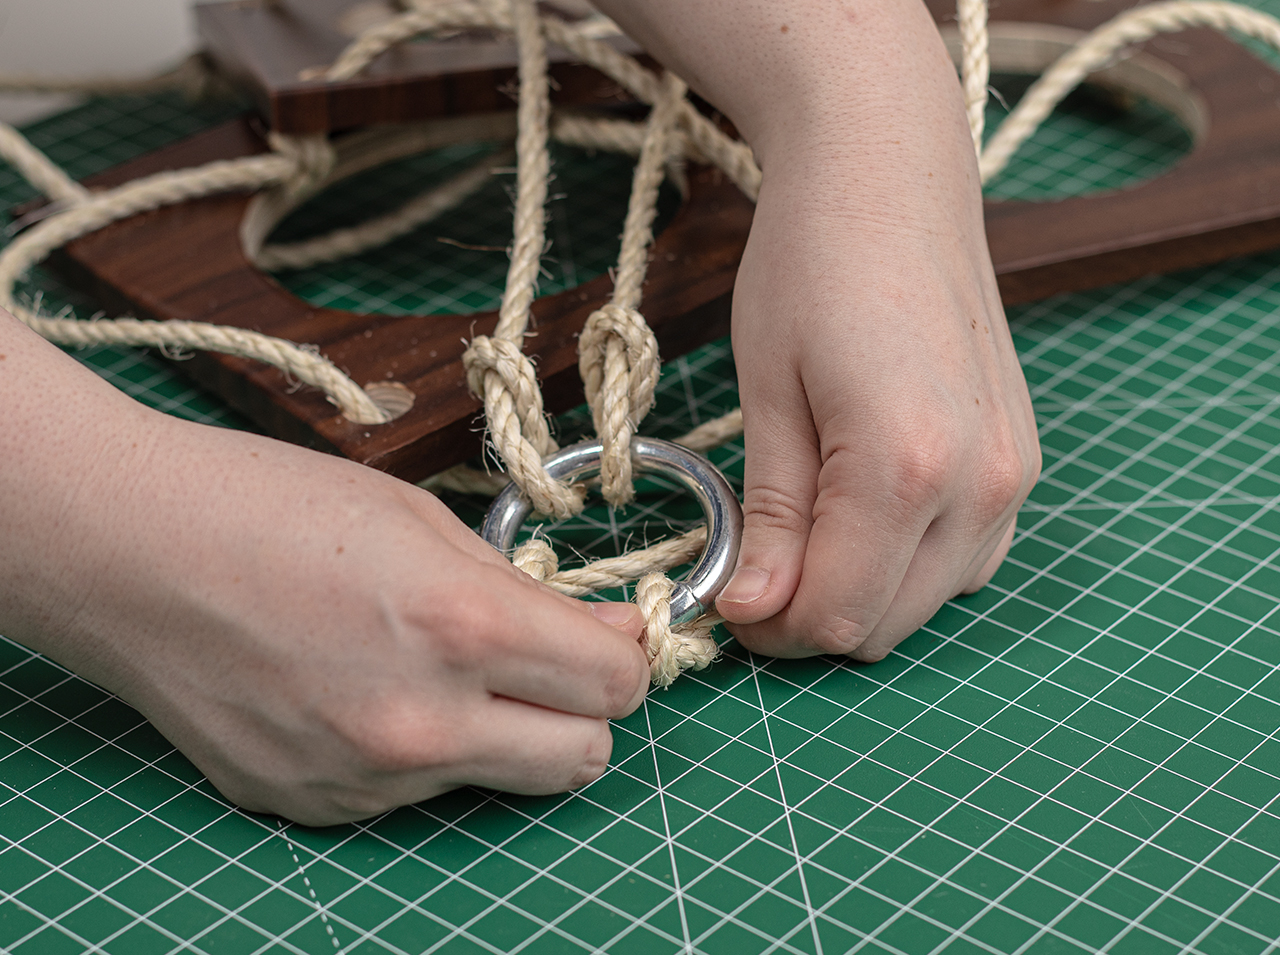
To hang the plants, pull the top ends of the cords through a metal ring and secure them by tying a knot or wrapping florist’s wire tightly around the cord. Now add the plants to the three plant pots and place them in the holes in the wooden bases.
Now you can attach your finished plant shelf to the ceiling with a hook.
You’re done!

Post A Comment
EXPERT ADVICE
Preparation time
15 min
Execution
45 min
Difficulty level
Advanced
Costs
Medium
No Comments